Avatars & 3D Virtual Prototyping – Week 4 by Antalya Todd

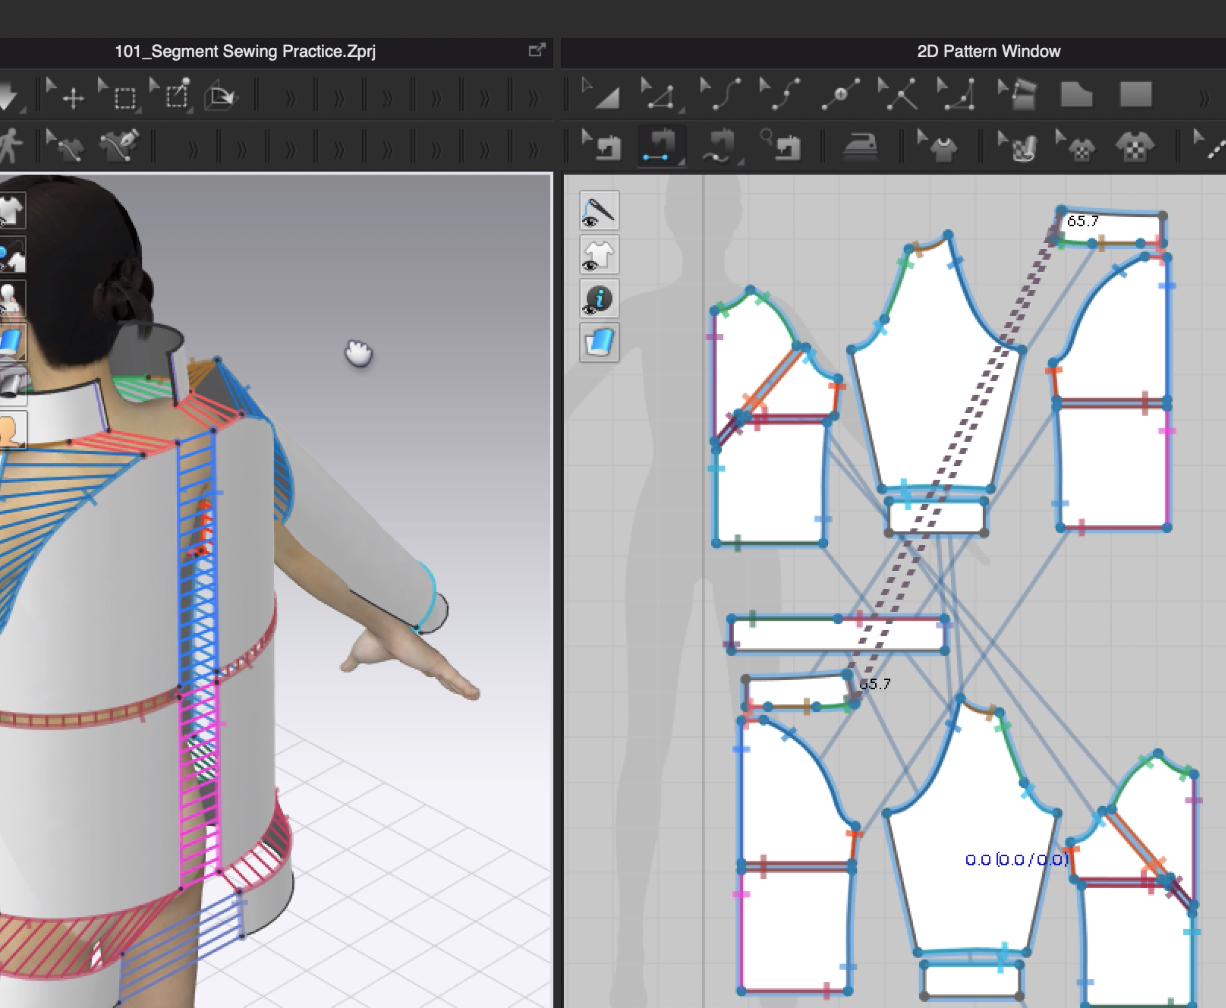
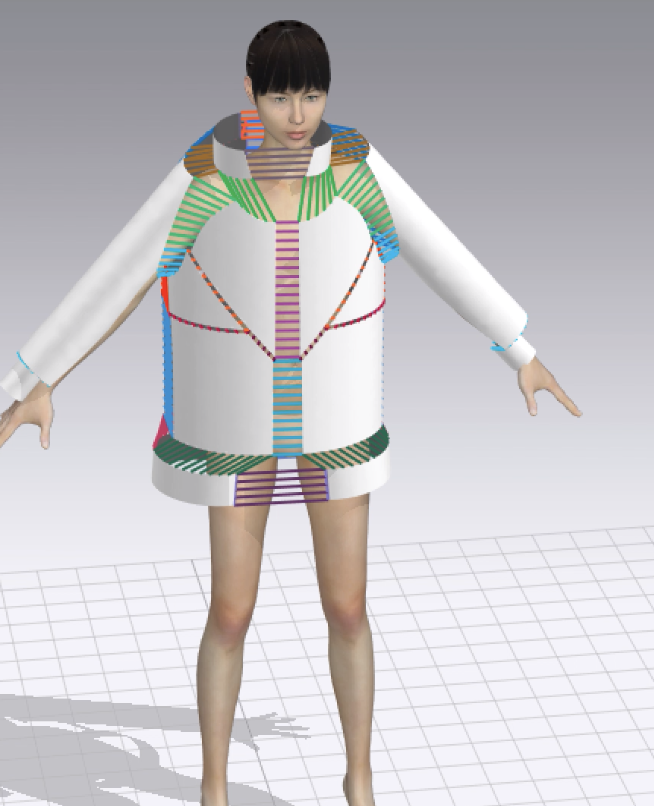
This week has been very productive and I’ve really enjoyed becoming even more familiar with using Clo3D – but trying to reach the end goal of the project (virtually simulating the Sailing Jacket in graded S / M / L sizes) has proven more difficult than I originally anticipated.

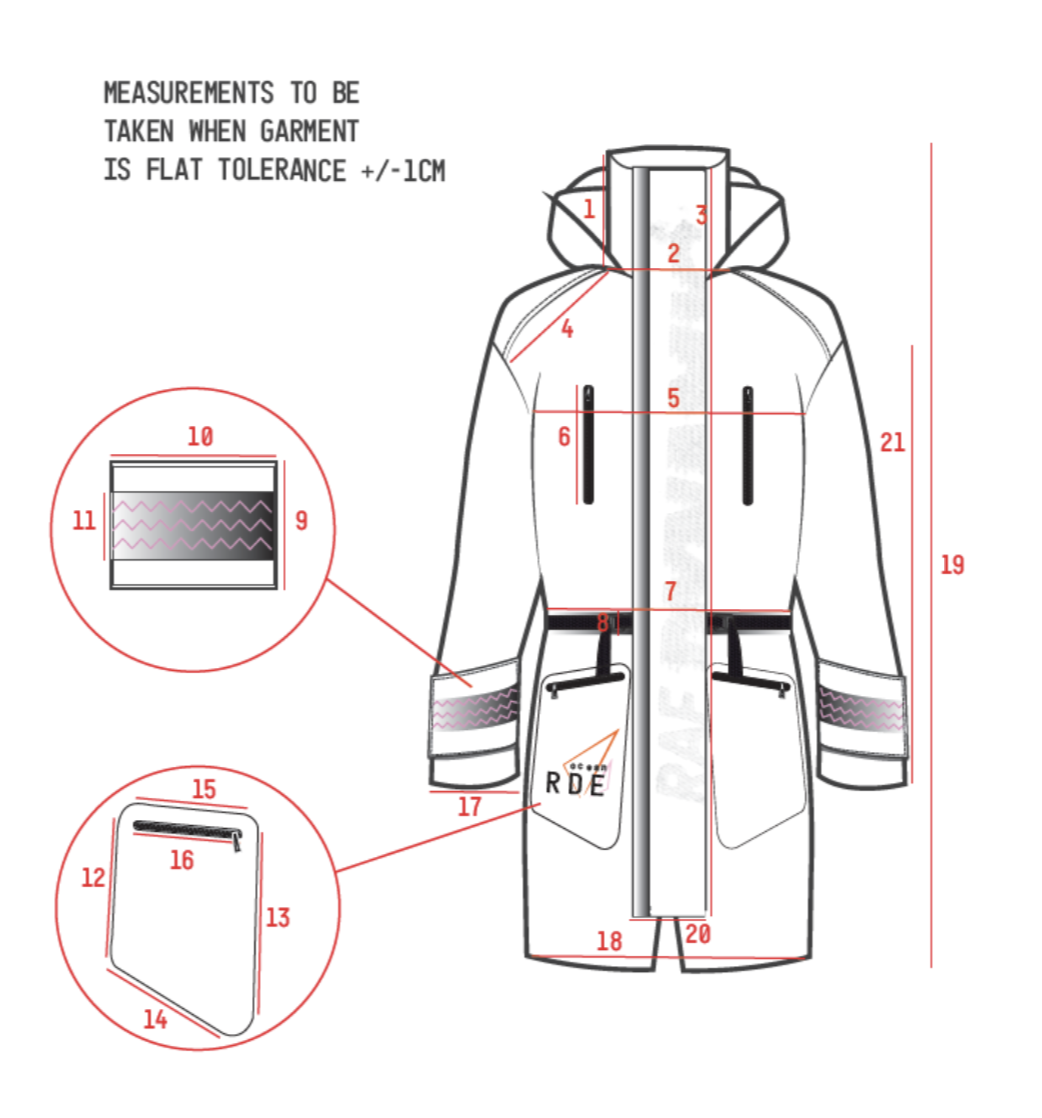
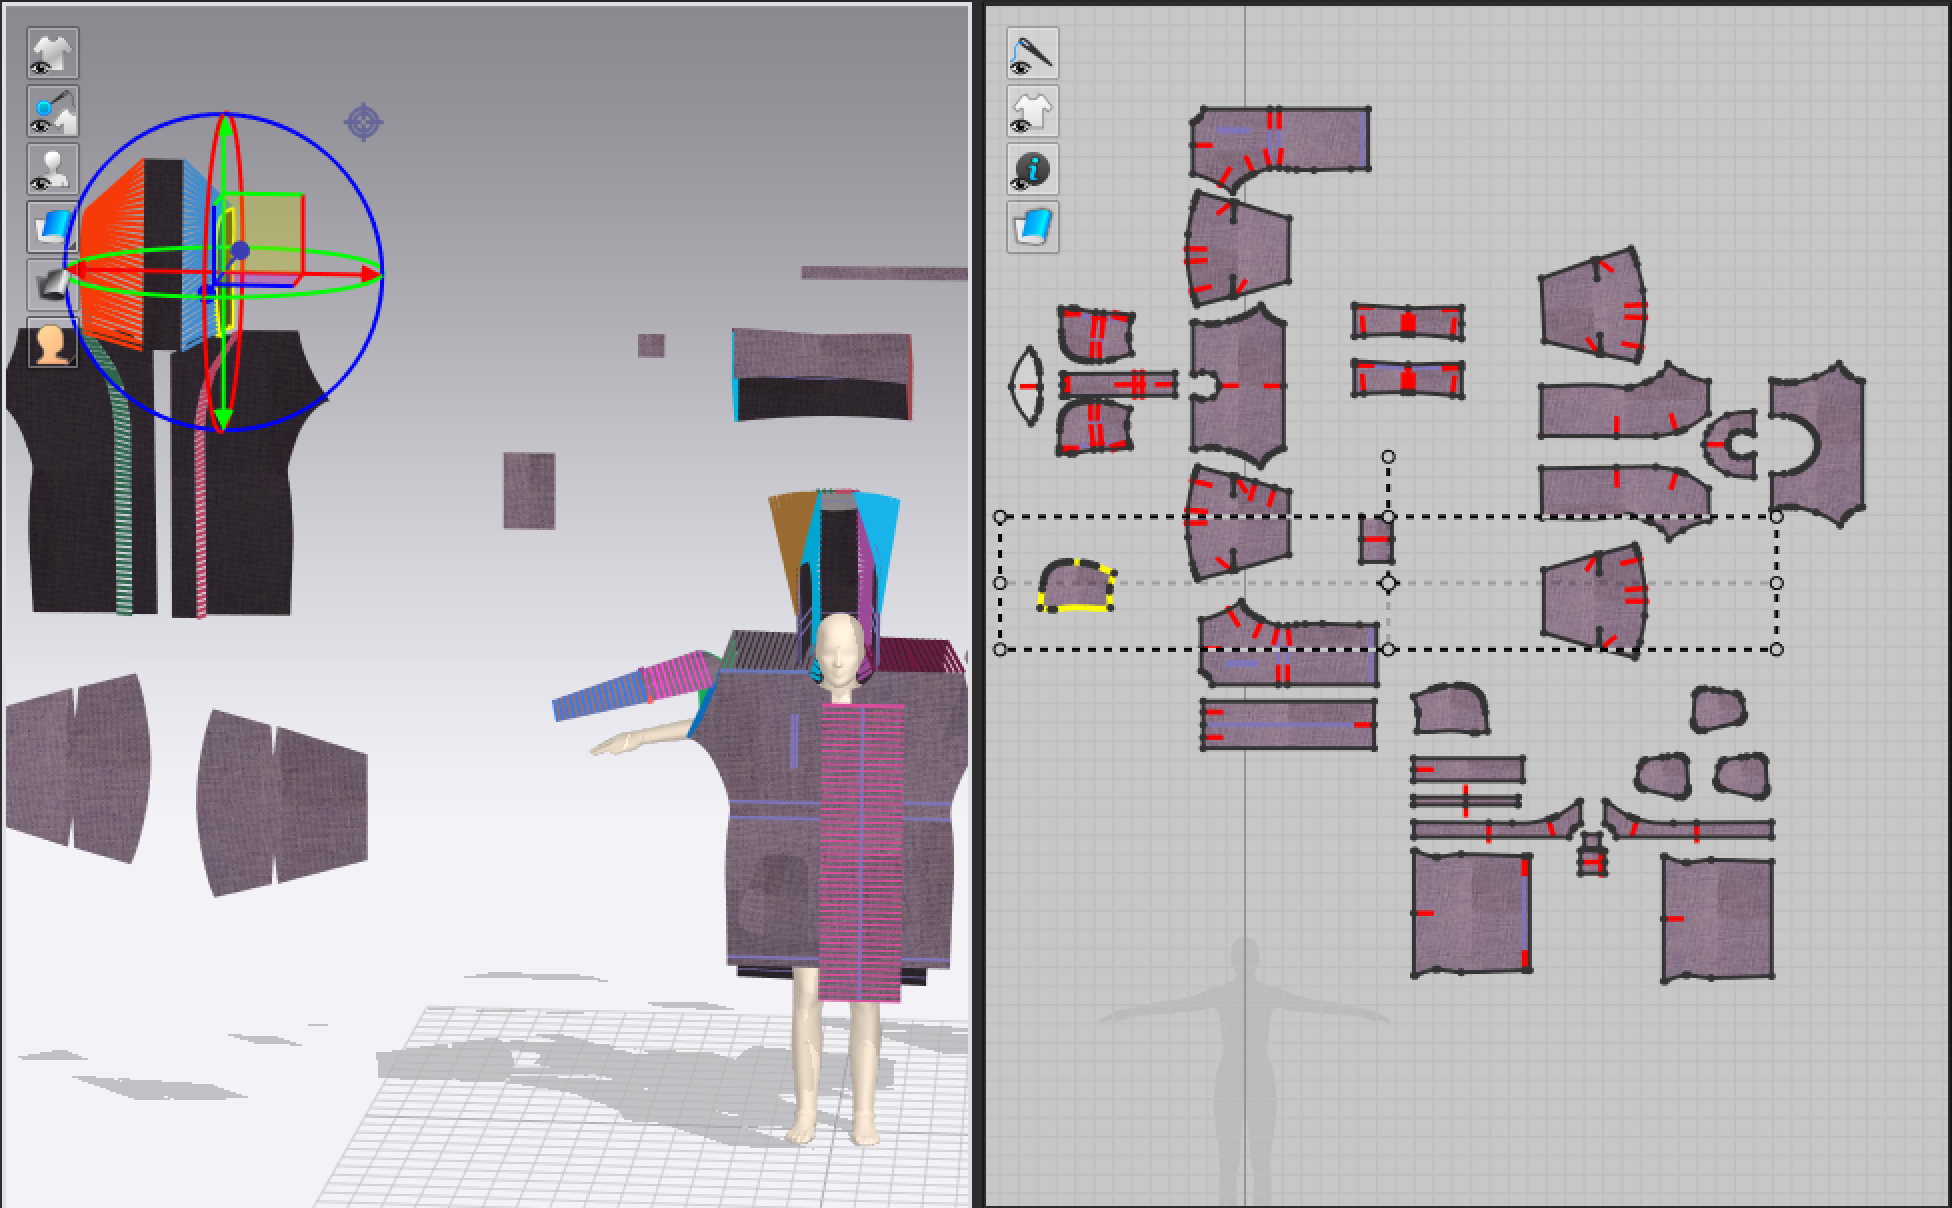
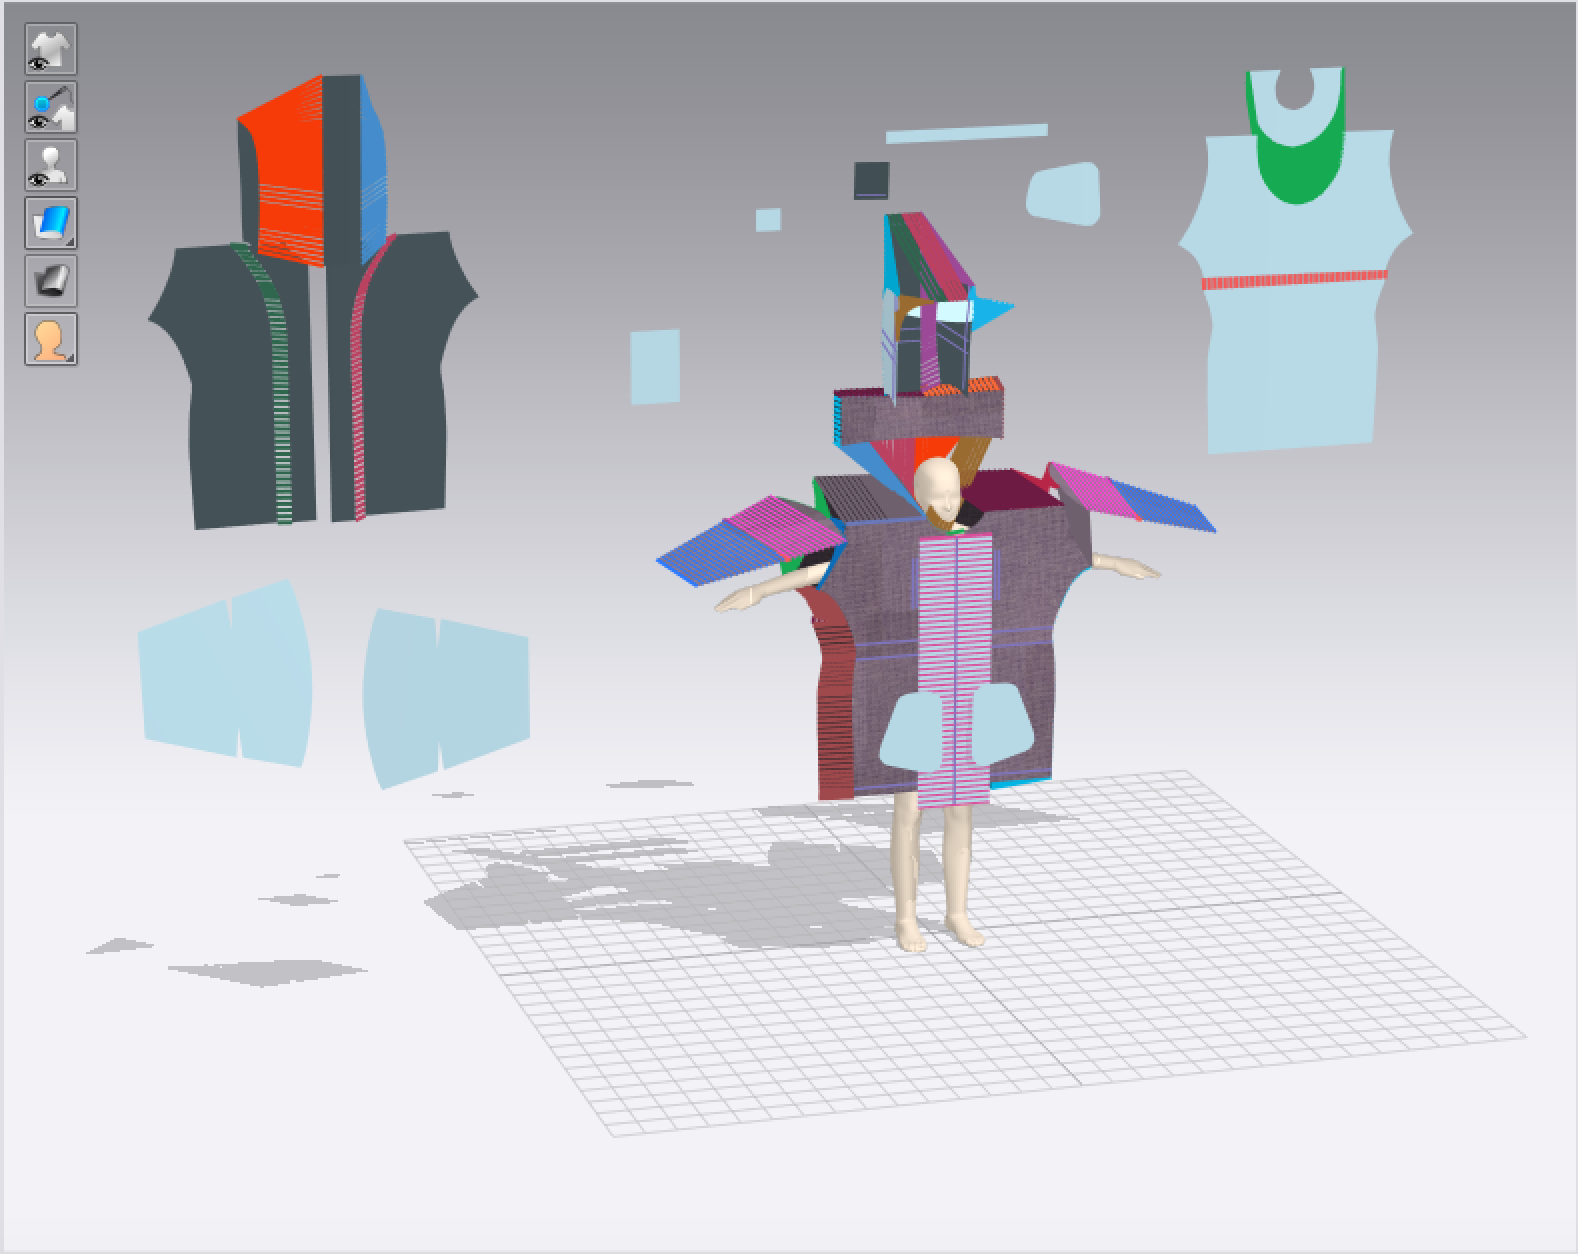
The Gerber patterns have now been cleaned up; removing seam allowances and opening darts ready for transferring across to Clo3D. I have put my new skills in Clo3D to the test by arranging and sewing the sailing jacket together as well as I can. Doing this for a lined garment has proven challenging as I’ve only been using the software for 3 weeks now. But I do feel like I am becoming more confident in using it the more I practice and the more I am forced to problem solve whilst sewing the garment together. The main difficulty at the moment is trying to simulate the correct fabric in Clo3D in order to let the garment fall properly over the avatar.

Using patterns created in Gerber to produce a virtual prototype in Clo3D
2D | 3D windows
Arranging and sewing Sailing jacket pattern pieces in Clo3D
3D window

On Wednesday I spent the morning in the textile testing lab (in Manchester Fashion Institute) and was introduced to FAST, a method of textile testing developed in Australia for quick testing of textile materials. Although originally developed for testing lightweight suiting fabrics, it can be used across a range of fabrics. I trialed the method using a standard polycotton suiting fabric, then input these test results into Clo3D to simulate the fabric as best as I could. I found that the testing itself was very straight forward to do, as I am familiar with lab-based textile testing and can easily follow algebraic formulae to work out the results in line with the given units.

However, despite obtaining accurate results from the testing, it proved almost impossible to form a correlation between these numeric results and the specifications of Clo3D. Because Clo is such a design-based software, there are few units provided when inputting the fabric properties (there are many sliders that can alter the value of each property – but these are not clearly correlated to numeric values). I have tried to simulate the test fabric to the best of my ability and am currently trialling the sailing jacket in this fabric, but I’m unsure as to how I will successfully simulate the final fabrics. 

Example of fabric properties input on Clo3D

Avatars & 3D Virtual Prototyping – Week 3 by Antalya Todd

I spent this week becoming familiar with the Clo3D software and used training files provided by Clo to practice my new skills. I am now confident in placing, sewing and simulating garments on avatar bodies. It’s been exhausting trying to learn a new method of fitting garments in such a short space of time but I’ve really enjoyed experimenting with industry-standard software and I am beginning to see how useful this could be for me going forward in the garment-technology side of my degree – it’s made me realise that the technology side of fashion is what I’m most interested in:)

Grace Rudge – technical portfolio Sailing Jacket.

The other area that I’ve looked at this week is reviewing the size specification for the Sailing jacket which will be virtually simulated as part of the final outcome for this project (curtesy of Grace Rudge –  FDT Graduate 2019). I’ve become hugely absorbed in size specifications and body proportions over the past few weeks so being able to review and alter a size specification for a real garment just made all of those elements click into place. I have learned the standard rules for grading garments and how to adapt these for dual size increments (S/M/L as oppose to UK 6-8-10). This is something that I really didn’t expect to have the chance to do as an undergraduate and I’m hoping that having knowledge in this area will make formulating my own garment size specifications from scratch much easier. I’m looking forward to putting these patterns and my Clo3D skills to the test next week when I simulate the base size (size S) and then begin to grade the patterns in line with my size specification using Gerber Accumark

Avatars and 3D Virtual Prototyping – Week 2 by Antalya Todd

This week has been far busier than the first week and it feels as though the project is very much underway. I have spent the majority of the week becoming familiar with the Clo3D software and can now adapt the sizing of avatars and make them MOVE within the virtual space! I can also simulate the movement of pattern pieces and sew them together using the software. 

It has been a fairly straightforward design programme to get used to due to it being so sleek and it’s really opened my eyes to the way in which technology can assist the design and pattern processes within the fashion industry. It has also become evident that an underlying knowledge of pattern cutting is required prior to using Clo3D to make experimenting with it much easier. For example, there is a specific order for constructing a collar correctly and the garment could not be simulated without this knowledge.

Sewing pattern pieces together in 2D window – displayed on avatar in 3D window
Clo3D
Sewn garment pre-simulation
Clo3D

On Wednesday I went in the 3D body scanner for the first time. This was a weird experience. I, like everyone else, am so used to looking down on my body and having a perception of its shape from looking down. (This confused me when Jayne first explained it, but your eyes are at the very top of your body so no matter where you are standing, you are always looking down at the rest of your body). The image produced from the body scanner looked as though my normal body had been taken and squashed down. It was a bit off putting and I could understand why many people would hate the idea of having their body scanned. But after creating a female avatar from my size specification and seeing myself as a 3D model, I realised that I wasn’t quite as much of a box shape as I thought (yay). 

The ‘real’ curves of women
telegraph.co.uk

This pushed me to start researching into the average size specifications of British women, and comparing them against the unrealistic body image that the media portrays. I came across some beautiful images of women with fat rolls and undefined waists, and it became evident that there is still such a reluctance to show real women’s bodies in clothing (or lack of). Despite the ‘curve’ or ‘plus size’ movement, these women still have a very smoothed down figure with a defined waist. A sought-after hourglass figure. This goes for the smaller models too, who may appear to be curvy when modelling bikinis for example, but are still a 24” waist and tiny hips. It’s all about the camera angle, poses and marketing. But I’ve realised that this is could be a huge part to do with how garments are being graded so badly. 

I mentioned in my last post that once a garment has been graded up/down two sizes, the patterns must be re-drafted (ie the process needs to restart) to be able to take the garment into further sizes successfully. If garments are being made for women who have seemingly curvy but smoothed down figures, they will not fit slim women with few curves, or larger women with curves in places other than their hips and bust. Garment shapes need to be adapted to fit the shape of women who’s bodies are realistic in today’s world.

I think that celebrating women’s bodies isn’t just to do with size, it is also majorly to do with shape and I think that using these 3D models could really alter women’s perceptions of themselves, as it did with my own experience, and also pave the way for better grading of garments by modelling them on realistic body shapes.